How we make our Motichoor Laddu
Gulzar Sweets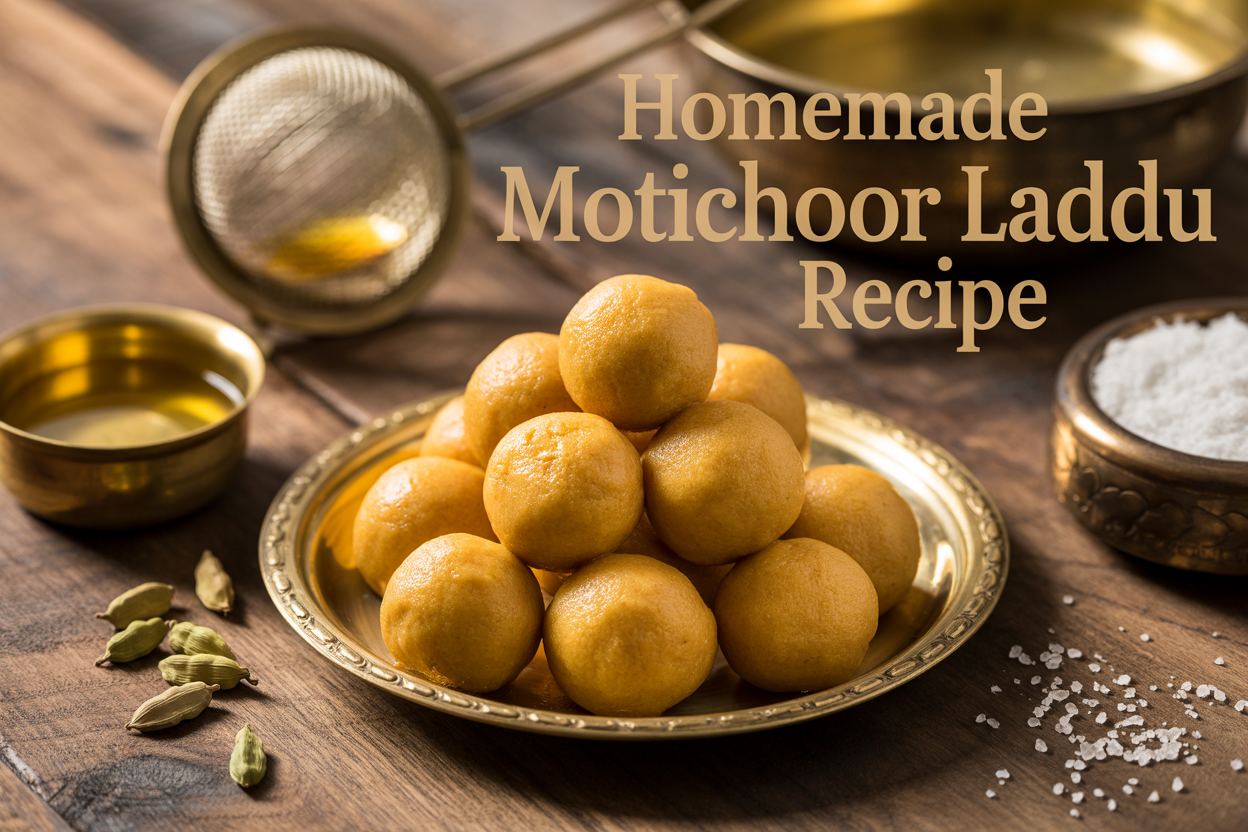
Making authentic motichoor laddu at Gulzar Sweets has been our family tradition for generations, and today we're excited to share our time-tested recipe with fellow sweet lovers and home bakers who want to create this beloved Indian sweet in their own kitchens.
Our homemade motichoor laddu recipe brings the same joy and flavor that has made our Hyderabadi sweet shop a favourite for decades. We believe that sharing our traditional motichoor laddu-making process helps preserve this beautiful culinary art while spreading happiness through food.
In this guide, we'll walk you through our essential motichoor laddu ingredients and the special equipment we use to create those perfect tiny pearls that melt in your mouth. You'll also learn our step-by-step batter preparation process and discover the secret techniques we use for creating the signature motichoor texture and binding everything together into those round, golden treats that everyone loves.
Essential Ingredients for Perfect Motichoor Laddu
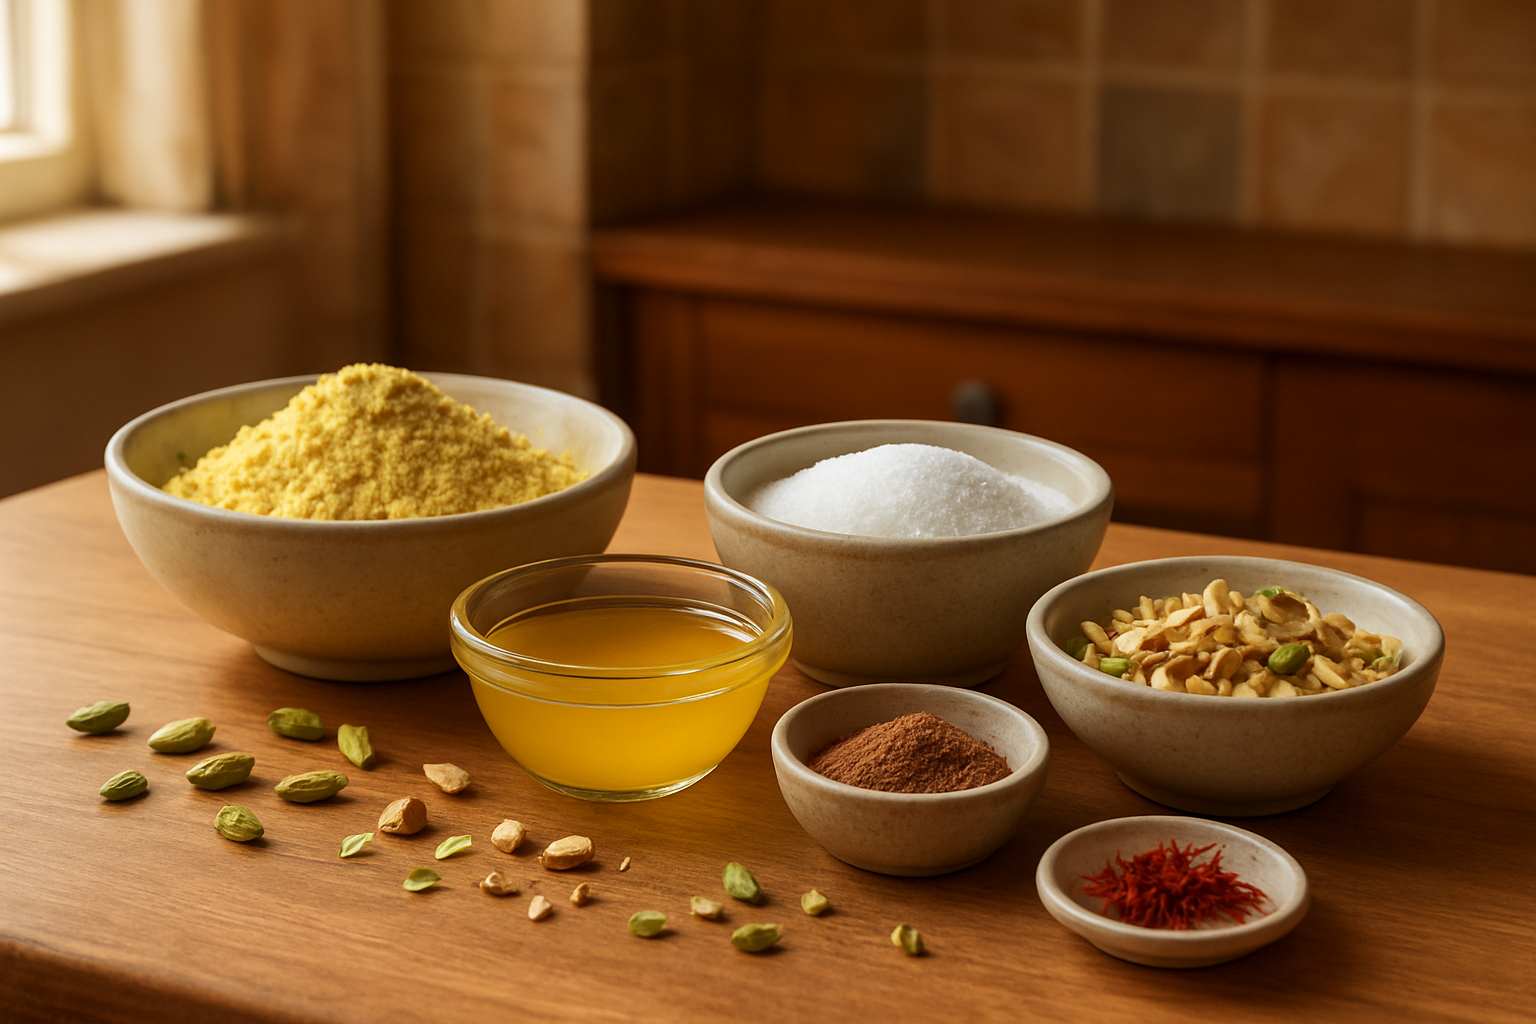
Premium besan flour selection for smooth texture
The quality of besan flour makes all the difference in creating authentic motichoor laddu with the perfect texture. Fresh gram flour, ground from high-quality chana dal, gives you those tiny, uniform pearls that dissolve beautifully in your mouth. Look for besan that feels fine and silky between your fingers - coarse flour will never give you the delicate motichoor texture you're after.
When shopping for besan, choose brands that grind their flour fresh or buy from stores with high turnover. Stale flour develops a bitter aftertaste that ruins the entire batch. The color should be bright yellow with no dark spots or lumps. Store your besan in an airtight container to maintain freshness and prevent moisture absorption, which can make the batter lumpy during preparation.
Pure ghee requirements for authentic flavor
Real motichoor laddu recipe success depends heavily on using pure, aromatic ghee. About 1/2 cup of ghee is needed per kilogram of besan for frying the tiny droplets, plus extra for greasing hands during shaping. The ghee should smell rich and nutty when heated - this tells you it's good quality.
Homemade ghee always works better than store-bought versions because it has more flavor depth. Heat the ghee to the right temperature before adding batter droplets. Too cool and the pearls absorb excess oil; too hot and they burn before cooking through. The ideal temperature creates a gentle bubbling when batter hits the surface.
Sugar and cardamom ratios for optimal sweetness
Getting the sweetness balance right takes practice, but the standard ratio works wonderfully: use equal weights of sugar and besan. For every cup of besan flour, add one cup of sugar to make the syrup. This creates the perfect binding consistency without making the laddus overly sweet.
Fresh cardamom pods ground at home release much more flavor than pre-ground powder. Use about 8-10 green cardamom pods per cup of besan, crushing them in a mortar and pestle just before adding to the mixture. The aromatic oils from freshly ground cardamom elevate the entire sweet, giving it that authentic taste you remember from traditional motichoor laddu preparation.
Food coloring choices for vibrant appearance
Traditional orange color comes from a pinch of food coloring mixed into the batter. Use gel-based colors rather than liquid ones - they give better color payoff without thinning the batter consistency. Orange and yellow work best, creating that classic motichoor appearance that makes these Indian sweet recipe creations so visually appealing.
Add coloring gradually while mixing the batter. Start with just a tiny amount - you can always add more, but you can't take it back. Natural alternatives like turmeric powder create a beautiful golden hue, though the color won't be as vibrant as artificial options.
Equipment and Tools Setup for Efficient Production
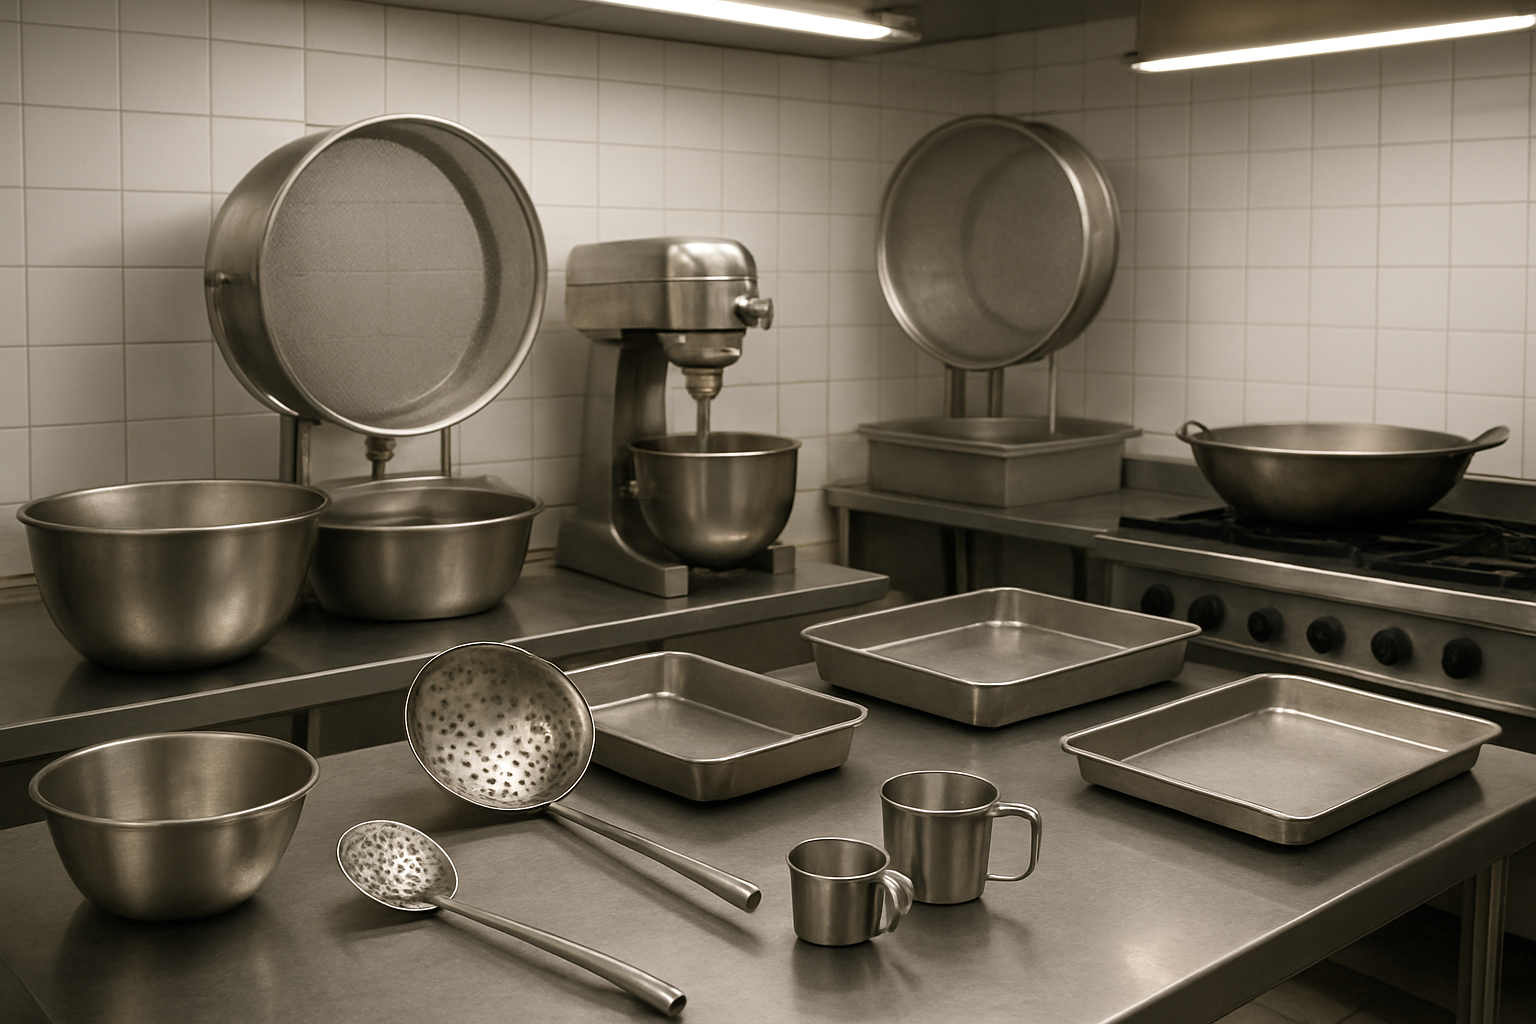
Specialized sieves for creating fine motichoor pearls
The heart of authentic motichoor laddu making process lies in creating those perfectly tiny, uniform pearls that give this beloved Indian sweet its signature texture. A specialized perforated ladle or jhara is absolutely essential for this task. Look for one with holes measuring approximately 2-3mm in diameter - any larger and your pearls will be too chunky, any smaller and the batter won't flow through properly.
Professional sweet makers often use custom-made brass or stainless steel sieves with precisely positioned holes. The spacing between holes matters just as much as their size. Ideally, holes should be positioned about 5-6mm apart to prevent the batter streams from merging during the frying process.
You can also use a large slotted spoon with small, evenly distributed holes as an alternative. Some home cooks successfully create motichoor using a colander with fine holes, though this requires more skill to maintain consistent pearl size. The key is testing your tool before making large batches - drizzle some batter through it over a bowl to check if the droplets are forming the right size.
Keep your sieve completely dry before use, as any moisture will cause the gram flour batter to stick and clog the holes. Having a backup sieve ready saves precious time during the critical frying stage of your homemade motichoor laddu preparation.
Heavy-bottomed pans for even heat distribution
Temperature control makes the difference between professional-quality motichoor and disappointing lumpy results. A heavy-bottomed kadhai or deep frying pan distributes heat evenly, preventing those frustrating hot spots that can burn your delicate gram flour pearls before they cook through properly.
Cast iron, thick aluminum, or heavy stainless steel pans work best for motichoor laddu preparation. The ideal pan should be at least 8-10 inches wide and 4-5 inches deep to accommodate the oil and allow space for the pearls to float freely. Narrow or shallow pans crowd the motichoor, causing uneven cooking and making it difficult to maintain the proper frying temperature.
The thickness of the pan bottom should be at least 4-5mm. Thin pans create temperature fluctuations that result in some pearls getting overcooked while others remain raw. This inconsistency affects both taste and texture in your final traditional motichoor laddu.
Before starting your authentic motichoor laddu recipe, test your pan by heating oil and checking if it maintains steady temperature across the surface. Drop a small amount of batter in different spots - it should sizzle uniformly everywhere. If you notice variations, adjust your heat source position or consider switching to a different pan.
Temperature monitoring tools for precise cooking
Guessing oil temperature leads to disaster when making motichoor. Professional results demand precision, which means investing in reliable temperature monitoring equipment. A good digital thermometer with a long probe gives you accurate, instant readings without burning your fingers.
The ideal oil temperature for frying motichoor pearls ranges between 325-350°F (165-175°C). Too hot, and the outside burns while the inside stays raw. Too cool, and the pearls absorb excess oil, becoming greasy instead of light and crispy. A clip-on candy thermometer that attaches to your pan edge lets you monitor temperature continuously without holding anything.
Infrared thermometers offer another excellent option, especially when working with large batches. Point and shoot temperature readings help you maintain consistency across different sections of your oil. These tools prove especially valuable when making multiple batches of motichoor laddu step by step.
Smart cooking thermometers with smartphone alerts take the guesswork out completely. Set your target temperature range, and the device notifies you if the oil gets too hot or cool. This technology allows you to focus on the intricate pearl-making technique while maintaining perfect frying conditions for your indian sweet recipe.
Step-by-Step Batter Preparation Process
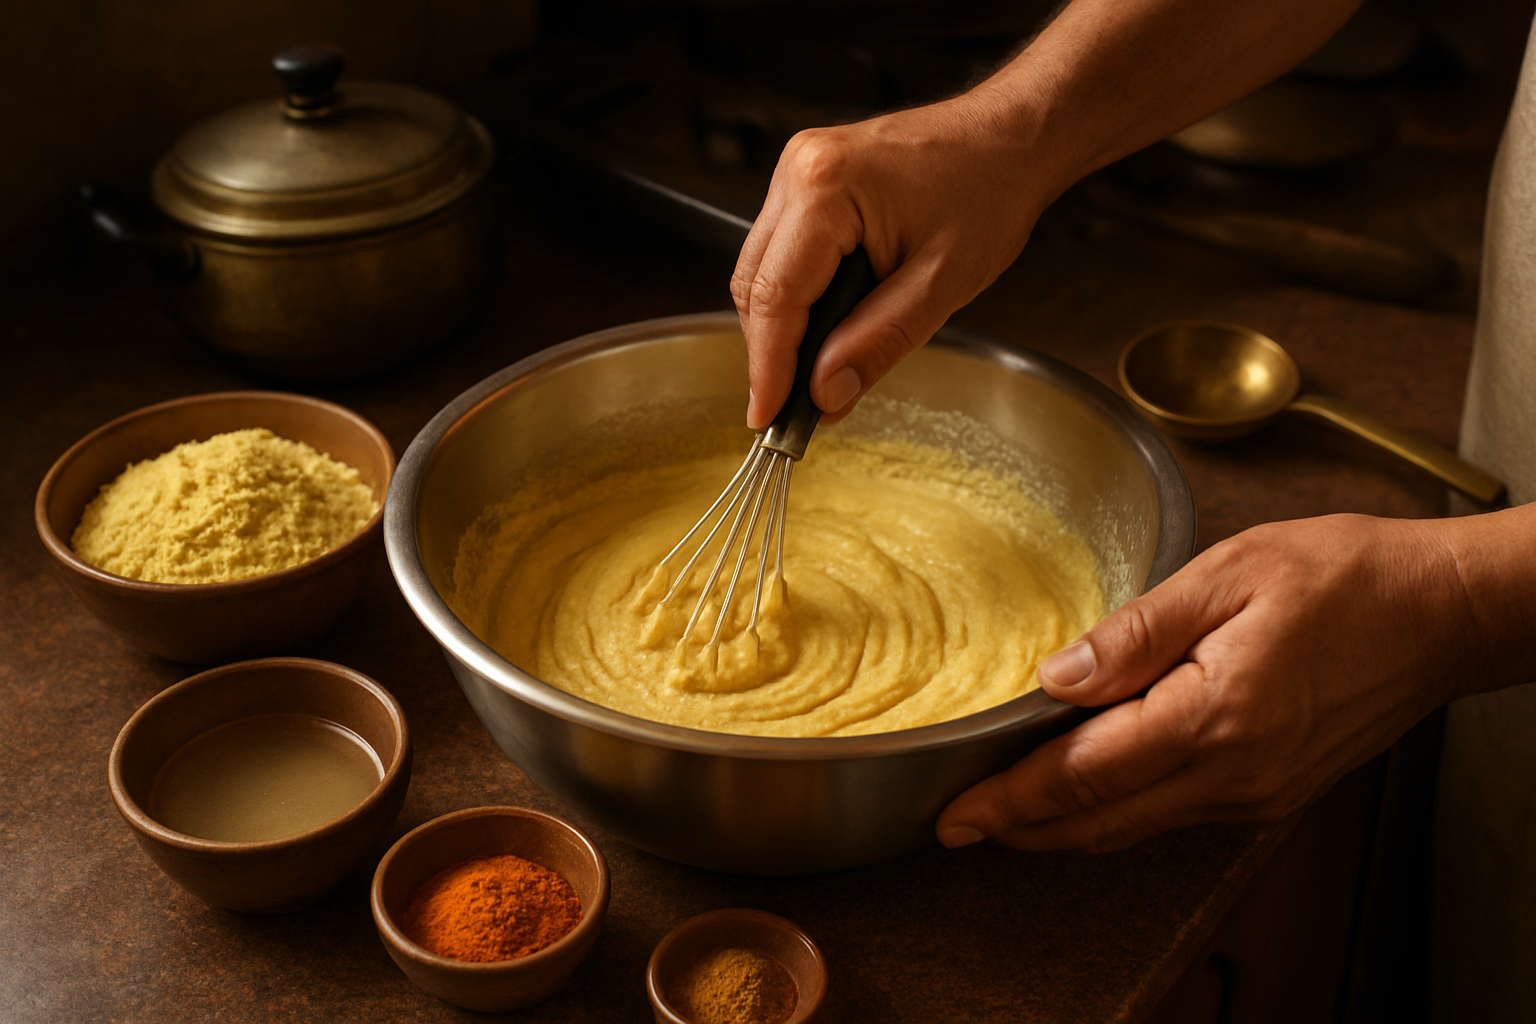
Achieving the perfect batter consistency
The foundation of exceptional motichoor laddu preparation lies in getting your batter consistency just right. You want a smooth, flowing batter that's thick enough to hold together but thin enough to pass through your perforated ladle easily. Mix equal parts besan (gram flour) and water, whisking continuously to prevent lumps from forming.
The ideal batter should coat the back of a spoon without dripping off immediately. When you lift your whisk, the batter should fall in a steady ribbon that disappears into the mixture within 2-3 seconds. If it's too thick, your motichoor pearls will be dense and heavy. Too thin, and they'll break apart in the oil, ruining your authentic motichoor laddu recipe.
Test your consistency by dropping a small amount into hot oil. Perfect batter creates round, fluffy pearls that rise to the surface quickly. Adjust with small amounts of water or flour until you hit that sweet spot.
Seasoning techniques for enhanced taste
Traditional motichoor laddu making process relies on subtle yet impactful seasonings that elevate the basic besan batter. Start with a pinch of orange food coloring - just enough to give that characteristic golden hue without overpowering the natural flavor.
Add half a teaspoon of baking soda to your batter for extra fluffiness. This creates the light, airy texture that makes homemade motichoor laddu so irresistible. Some recipes call for a tablespoon of fine semolina (sooji) mixed into the batter, which adds a delightful crunch to each pearl.
For enhanced flavor depth, incorporate a few drops of ghee directly into the batter. This creates a richer taste and helps achieve that perfect golden color when frying. Keep seasonings minimal - the beauty of this traditional motichoor laddu lies in its simplicity.
Resting time requirements for optimal results
Your batter needs proper resting time to develop the right texture for successful motichoor laddu step by step preparation. Allow the mixed batter to rest for 15-20 minutes at room temperature. This resting period lets the besan fully hydrate and any small lumps dissolve naturally.
During this time, the baking soda activates and creates tiny air pockets throughout the batter. Cover the bowl with a damp cloth to prevent a skin from forming on top. The rested batter should feel slightly thicker than when first mixed - this is normal and actually preferred.
Never skip this crucial step, even when you're eager to start frying. The resting time directly impacts the final texture of your motichoor pearls and the overall quality of your indian sweet recipe.
Common batter mistakes to avoid
Many home cooks struggle with lumpy batter when following their motichoor laddu recipe. Always sift your besan before mixing to prevent stubborn lumps. Use room temperature water and add it gradually while whisking continuously in one direction.
Over-mixing after adding baking soda breaks down the leavening effect, resulting in flat, dense pearls. Fold the baking soda in gently and stop mixing once incorporated. Another frequent mistake is making the batter too far in advance - prepare it just 15-20 minutes before frying for best results.
Temperature matters too. Batter that's too cold won't fry properly, while overly warm batter can become sticky and difficult to work with. Keep everything at room temperature for consistent results in your how to make motichoor laddu adventure.
Mastering the Motichoor Pearl Creation Technique
Oil Temperature Control for Uniform Pearls
Getting the oil temperature just right makes all the difference in creating those perfect tiny motichoor pearls. Heat your oil to exactly 350°F (175°C) - this sweet spot ensures the batter drops form beautiful round pearls without getting too dark or staying undercooked. Use a candy thermometer to monitor the temperature throughout the process, as even small fluctuations can affect pearl formation.
When the oil temperature drops below 340°F, the pearls become irregular and absorb too much oil. If it goes above 360°F, they'll brown too quickly on the outside while staying raw inside. Keep the heat on medium and adjust as needed. Test with a small drop of batter first - it should sizzle immediately and rise to the surface within 2-3 seconds.
Sieving Methods for Consistent Pearl Size
The secret to uniform motichoor pearls lies in your sieving technique. Use a fine-mesh ladle or perforated spoon with holes approximately 3-4mm in diameter. Hold the ladle about 6 inches above the hot oil and gently tap its side while pouring the batter through. This creates consistent droplets that form evenly sized pearls.
Work in small batches, using only 2-3 tablespoons of batter at a time. This prevents overcrowding in the oil and ensures each pearl has enough space to cook properly. The key is maintaining a steady rhythm - tap, pour, tap, pour. Practice this motion before you start cooking to develop muscle memory.
Timing Secrets for Golden-Colored Motichoor
Perfect golden motichoor pearls need exactly 45-60 seconds in the oil. Start timing the moment the pearls hit the oil surface. They'll initially be pale yellow, then gradually turn light golden, and finally reach that perfect deep golden color that screams authentic motichoor laddu.
Watch for visual cues: the pearls will stop bubbling vigorously and start floating freely on the surface. They should sound crispy when you tap them gently with a slotted spoon. Don't wait for them to turn brown - remove them at the golden stage as they'll continue cooking slightly even after removal.
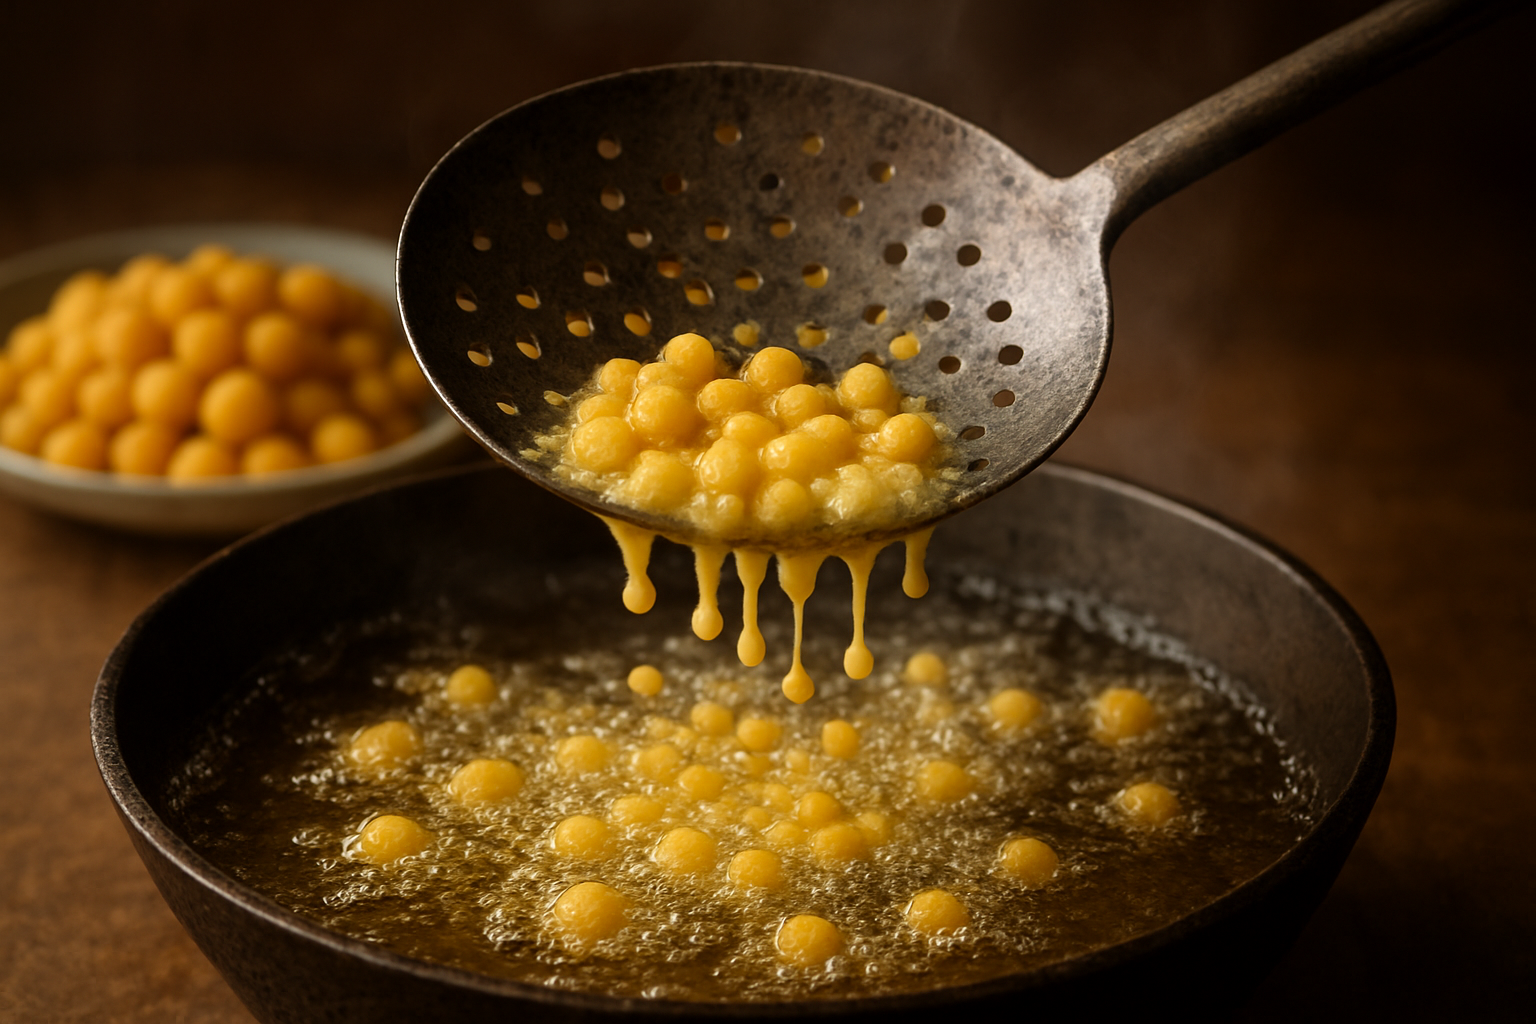
Draining Techniques to Remove Excess Oil
Proper draining prevents greasy motichoor pearls that can ruin your final laddu texture. Use a fine-mesh strainer or slotted spoon to lift the pearls out of the oil. Hold them over the oil for 10-15 seconds, allowing excess oil to drip back into the pan.
Transfer the pearls immediately to a plate lined with paper towels or clean kitchen cloth. Gently shake the strainer while draining to help oil escape from between the pearls. Don't press down on the pearls - this can break their delicate structure and make them dense.
Cooling Procedures to Maintain Texture
Let the freshly fried motichoor pearls cool for exactly 8-10 minutes before mixing with sugar syrup. This cooling period is crucial - hot pearls will make the syrup too thin, while completely cold pearls won't absorb the syrup properly.
Spread the pearls in a single layer on a clean plate, allowing air circulation around each pearl. Avoid stacking them, as this can create steam and make them soggy. The pearls should feel warm to touch but not hot when you're ready to combine them with the sugar syrup for the final motichoor laddu preparation.
Sugar Syrup Preparation and Binding Methods
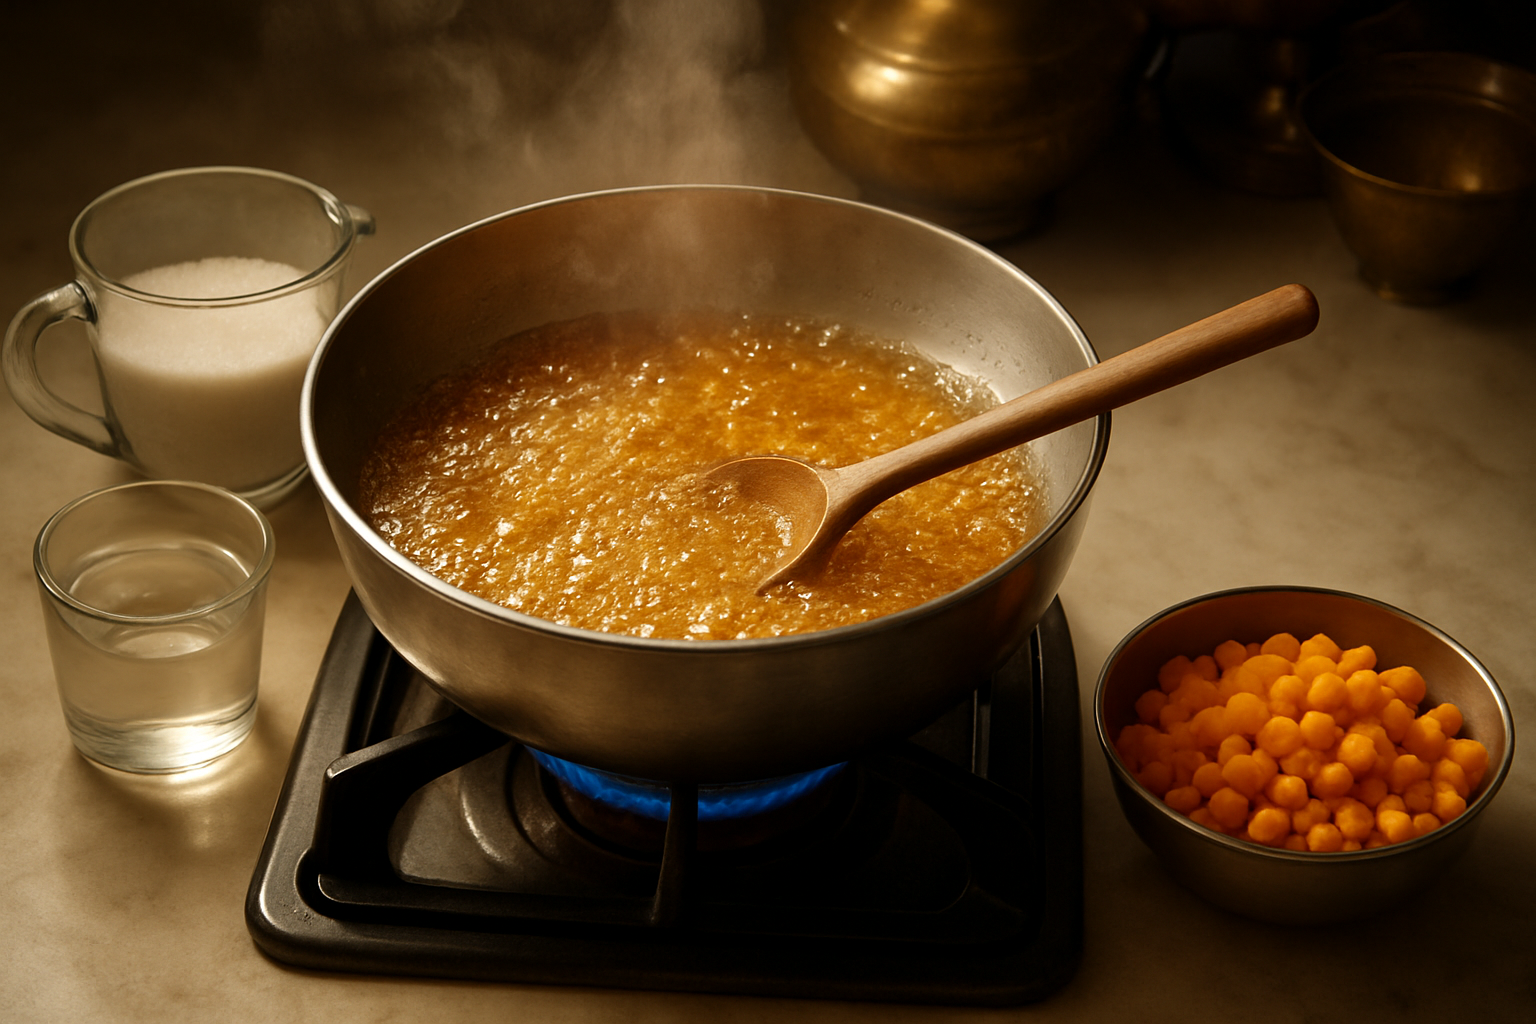
Achieving the Ideal Syrup Consistency
Getting your sugar syrup just right makes all the difference in your motichoor laddu recipe. The sweet spot you're aiming for is what we call "one-string consistency" - when you dip a spoon into the syrup and lift it, the syrup should form a single, steady thread that doesn't break immediately.
Start with equal parts sugar and water, heating them together in a heavy-bottomed pan. Watch the syrup carefully as it bubbles and reduces. You'll know it's ready when it reaches 220-225°F on a candy thermometer, or when the thread test works perfectly. The syrup should coat your spoon but still flow smoothly - too thick and your laddus will turn hard, too thin and they won't hold their shape.
| Syrup Stage | Temperature | Thread Test Result |
|---|---|---|
| Too thin | Below 215°F | No thread forms |
| Perfect | 220-225°F | Single steady thread |
| Too thick | Above 230°F | Multiple thick threads |
Flavoring the Syrup with Cardamom and Saffron
Authentic motichoor laddu preparation relies heavily on the aromatic magic of cardamom and saffron. Crush 8-10 green cardamom pods and extract the seeds, then grind them into a fine powder using a mortar and pestle. Add this cardamom powder to your syrup during the last few minutes of cooking.
For saffron, soak a generous pinch of good-quality threads in two tablespoons of warm milk for 10 minutes. The milk should turn a beautiful golden color. Pour this saffron milk into your syrup just before removing it from heat. The combination creates that signature traditional motichoor laddu flavor that's both floral and luxurious.
Some families add a drop of kewra water or rose water for extra fragrance, but cardamom and saffron remain the stars of this authentic motichoor laddu recipe.
Mixing Motichoor with Syrup for Proper Coating
The mixing process requires quick hands and careful attention. Remove your crispy motichoor pearls from the oil and drain them on paper towels for just 30 seconds - they should still be slightly warm when you add the syrup.
Pour the hot syrup over the motichoor in a large mixing bowl. Using a wooden spoon or spatula, gently fold the mixture, ensuring every pearl gets coated evenly. The motichoor will absorb the syrup within 2-3 minutes, transforming from individual crispy pearls into a cohesive mixture that holds together when pressed.
Work quickly during this motichoor laddu making process - the mixture becomes harder to shape as it cools. If it seems too dry, add a tablespoon of warm syrup. If too wet, let it sit for another minute to absorb excess moisture.
Shaping and Final Assembly Techniques
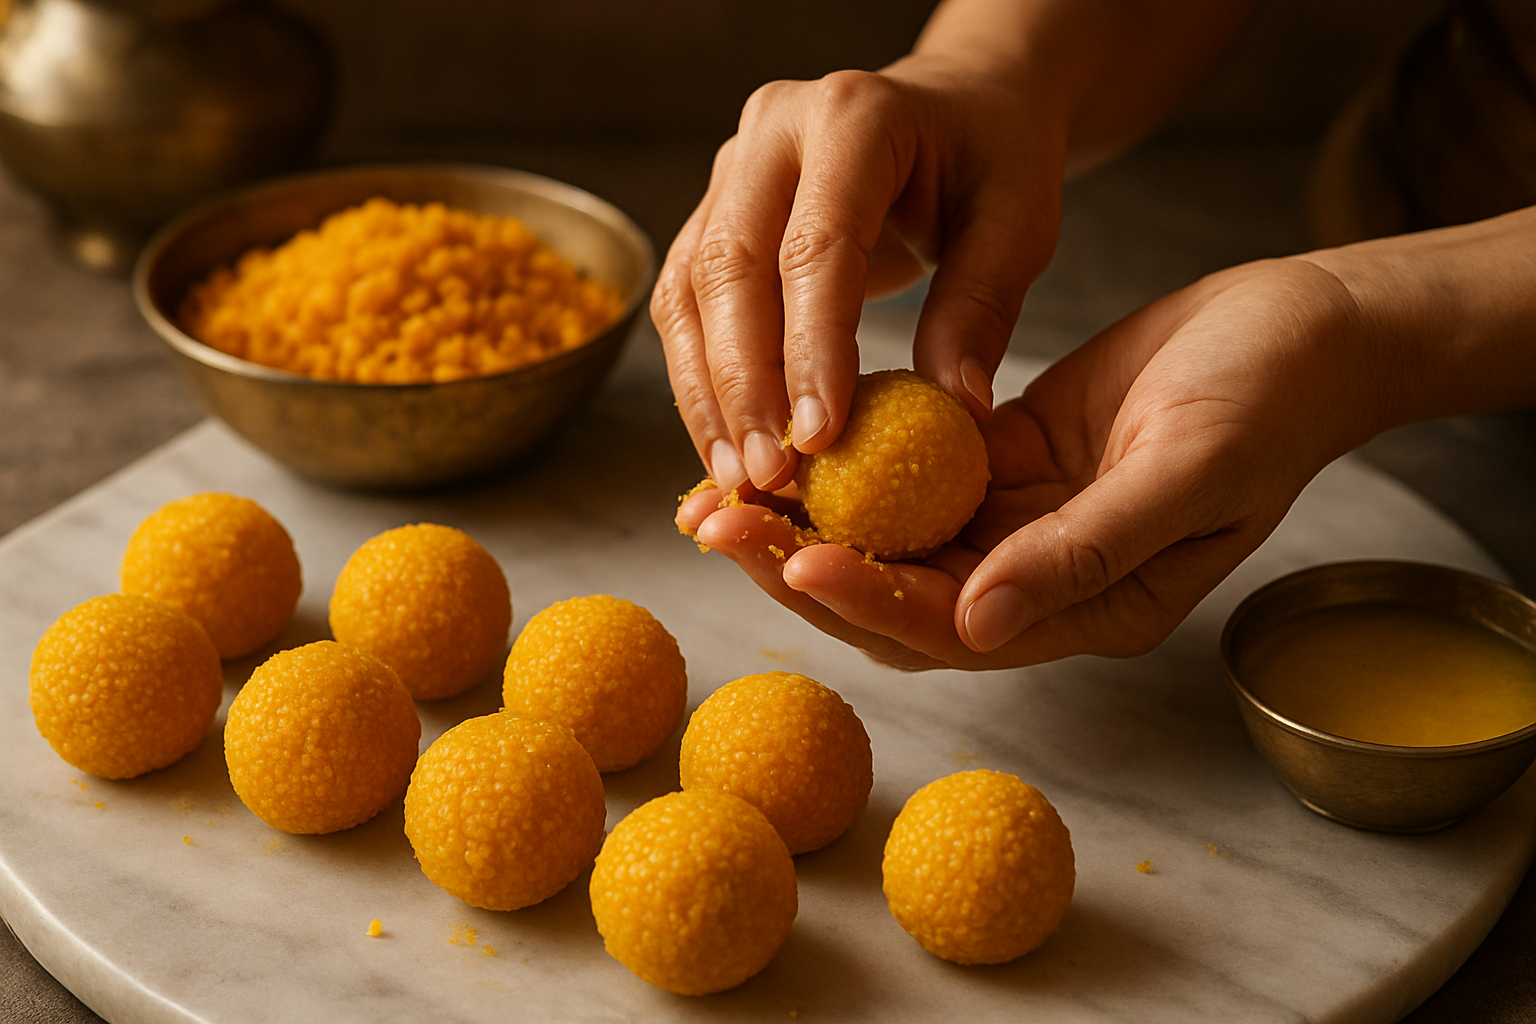
Hand-pressing methods for round laddus
The key to perfectly shaped motichoor laddus lies in mastering the hand-pressing technique. Start by taking a small portion of the prepared motichoor mixture in your dominant hand - about the size of a golf ball works best. Cup your palms together and gently compress the mixture while rotating it between your hands. The motion should be similar to rolling clay between your palms, but with less pressure to avoid crushing the delicate pearls.
Apply consistent, gentle pressure as you rotate the mixture. The natural oils from ghee and the binding properties of the sugar syrup will help the pearls stick together. If the mixture feels too dry and crumbly, lightly dampen your palms with a tiny amount of ghee or milk. Avoid using water as it can make the laddus soggy and affect their shelf life.
The rolling motion should be continuous and smooth. Start with light pressure and gradually increase it as the laddu takes shape. Keep your palms slightly cupped to maintain the round form. A well-shaped motichoor laddu should feel firm but not hard when pressed gently.
Size consistency tips for professional appearance
Maintaining uniform size across your batch of motichoor laddus gives them a professional, commercial appearance. Use a small kitchen scale to portion the mixture - each laddu should weigh approximately 25-30 grams. This creates laddus roughly the size of a large walnut.
Create a simple measuring tool using an ice cream scoop or tablespoon to portion the mixture consistently. A standard tablespoon holds about the right amount for one medium-sized laddu. Line up your portions on a clean plate before you start shaping to ensure even distribution.
Work systematically through your batch, shaping all laddus to the same size before moving to garnishing. Keep a ruler nearby during your first few attempts to check diameter - aim for laddus that are 1.5 to 2 inches across. With practice, you'll develop muscle memory for the correct size.
Temperature plays a role in consistency too. Work with the mixture while it's still slightly warm, as cooled mixture becomes harder to shape uniformly.
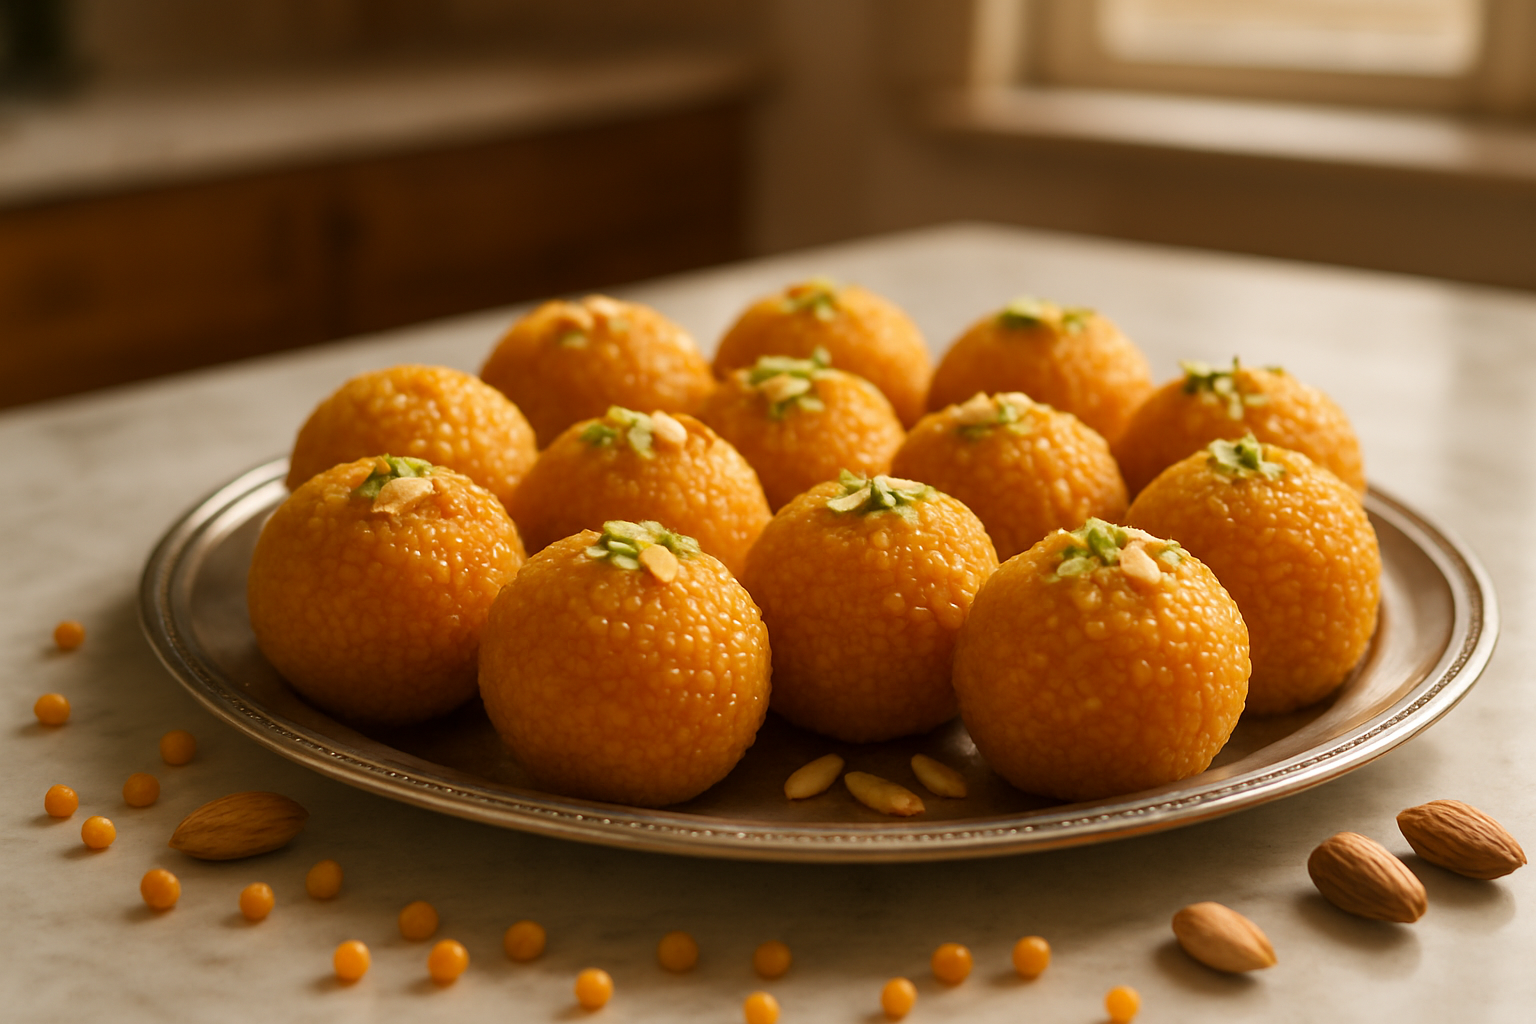
Garnishing options with nuts and silver leaf
Traditional motichoor laddu garnishing adds visual appeal and extra flavor layers. Chopped pistachios and almonds are classic choices - slice them thinly so they adhere better to the curved surface. Press the nuts gently into the laddu while it's still soft from shaping.
Silver leaf (varak) gives an authentic, festive appearance. Handle the delicate silver sheets with clean, dry hands or tweezers. Tear small pieces and press them lightly onto the laddu surface. The natural oils will help the silver stick without additional adhesive.
For special occasions, try rose petals, chopped cashews, or even a single whole pistachio pressed into the center. Some recipes call for a light dusting of desiccated coconut, which adds texture and helps preserve freshness.
Apply garnishes immediately after shaping while the surface is still slightly tacky. This ensures better adhesion and prevents decorations from falling off during storage.
Storage preparation for extended freshness
Proper storage preparation extends your homemade motichoor laddu shelf life significantly. Allow the shaped laddus to cool completely at room temperature before storage - this prevents condensation inside containers.
Choose airtight containers made of food-grade plastic or glass. Layer the laddus carefully with parchment paper between levels to prevent sticking. Avoid overcrowding containers as this can deform the round shapes.
Store at room temperature in a cool, dry place away from direct sunlight. Well-made motichoor laddus stay fresh for 5-7 days when stored properly. For longer storage, refrigerate for up to two weeks, but bring to room temperature before serving for the best texture and flavor.
Never store laddus while they're still warm, and keep different flavored sweets in separate containers to prevent flavor transfer.
Making authentic motichoor laddu takes patience, practice, and the right technique, but the results are absolutely worth it. From getting those tiny, perfect pearls to achieving the right sugar syrup consistency, every step plays a role in creating that melt-in-your-mouth texture we all love. The key is controlling your oil temperature, timing your sugar syrup perfectly, and working quickly during the shaping process.
We've shared these techniques because we believe great sweets should be accessible to everyone, whether you're buying from our shop or trying your hand at home. Give our method a try – start with small batches to get comfortable with the process, and don't worry if your first attempt isn't perfect. Even our master sweet makers took years to perfect their craft, so be patient with yourself and enjoy the delicious journey of learning this traditional art.